Whether you apply it inside or outside, adding new caulk to kitchen sinks and bathroom tubs or around windows and siding gives the job that final touch and brings the perfect ending to a project. But caulk eventually needs to be replaced, especially in well-used areas.
Caulk is an effective sealant and learning how to remove and reapply it is valuable to help prevent costly water damage to your home. So, when you start seeing signs of caulk cracking, pulling away, or growing mold and mildew, it's time to remove and replace it.
Why Would You Remove Caulk?
You might be wondering if there are any warning signs that it’s time to remove and replace the silicone caulk in your home. Let’s look at several reasons a homeowner might want to remove caulk from showers, bathtubs, or sinks.
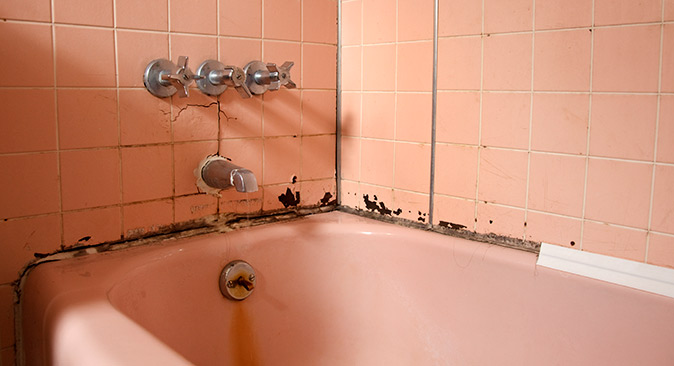
Mold and Mildew Buildup
Caulk can trap moisture over time, which creates an environment for mold and mildew to grow, especially in areas like showers, bathtubs, and sinks. If the caulk has become discolored or smells musty, it’s a sign that mold is present, and removal is necessary for hygiene and health.
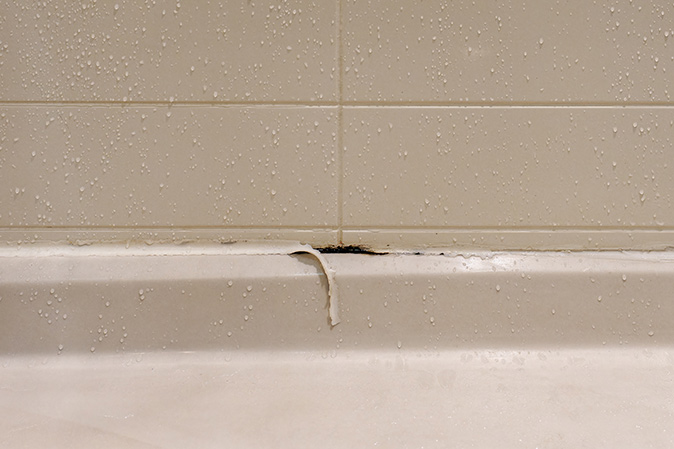
Cracking, Shrinking, or Peeling
Caulk can deteriorate over time due to moisture, temperature changes, and regular wear and tear. When caulk cracks, peels, or shrinks, it no longer provides a proper seal, leaving gaps that allow water or air to leak through. Replacing the old caulk helps restore the seal.
Water Damage
Old or damaged caulk can allow water to leak around sinks, bathtubs, or shower areas. This can lead to water seeping into the walls, which can cause damage or even structural problems like mold growth or rotting wood. Replacing the caulk can prevent such damage.
Aesthetic Improvements
Over time, caulk can become stained, dirty, or yellowed, especially in high-moisture areas like bathrooms. Replacing old caulk with fresh caulk helps improve the aesthetic of the area by providing a cleaner, fresher look.
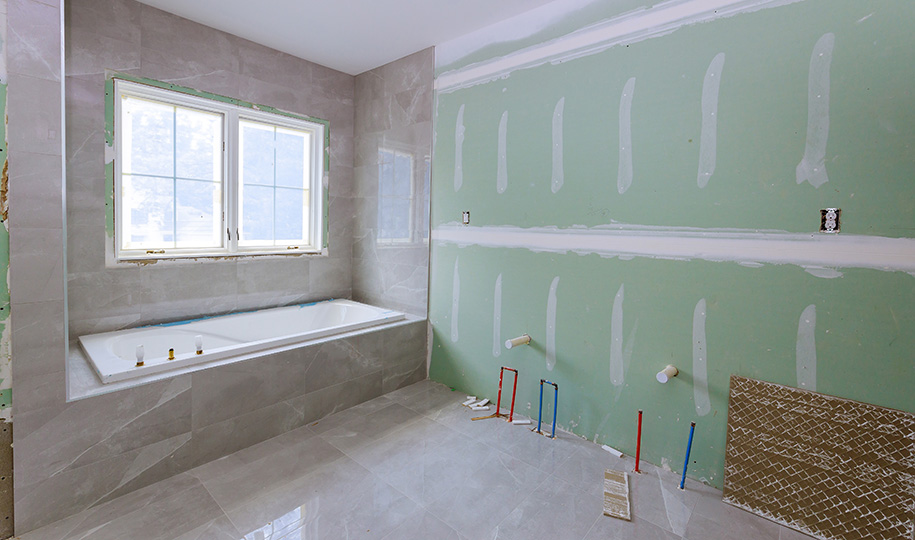
How to Remove Old Caulk from Showers, Bathtubs, and Sinks
So, you’ve decided it’s time to remove caulk from your shower, bathtub, or sink, but you aren’t sure how to do this yourself. While removing caulk might seem like a tedious task, it can be a straightforward process with the right tools and techniques. Here is a step-by-step guide to help you remove caulk effectively.
Step 1: Soften the Caulk
When removing caulk, the first thing you’ll need to do is soften it with a commercial caulk remover, vinegar, or rubbing alcohol. Commercial caulk removers are specifically designed to soften and loosen old caulk for easier removal. These usually involve spraying the product on the caulk and letting it sit for 30 minutes to an hour.
Step 2: Cut the Caulk
Next, using a utility knife or a caulk removal tool, you’ll cut through the caulk along its edges. Work carefully to avoid damaging the surrounding areas, especially if they’re old or delicate.
You should make two cuts – one along the edge where the caulk meets the tile or surface, and another parallel cut along the opposite edge where the caulk meets the tub, sink, or shower. This will allow you to remove the caulk from both surfaces.
Step 3: Peel the Caulk Away
This next step involves peeling the caulk off in strips or sections. You’ll start by pulling at one edge and working your way across. If the caulk is still resistant, use a plastic scraper tool or putty knife to lift it from the surface. Be careful to avoid scratching or damaging the surfaces underneath, especially when dealing with acrylic, porcelain, or tiles.
Step 4: Remove Residual Caulk
After removing most of the caulk, you may notice small remnants remain on the surface. Use a plastic scraper to carefully scrape off any remaining caulk. For stubborn remains, you can apply a small amount of caulk remover or rubbing alcohol to soften them before wiping or scraping them off.
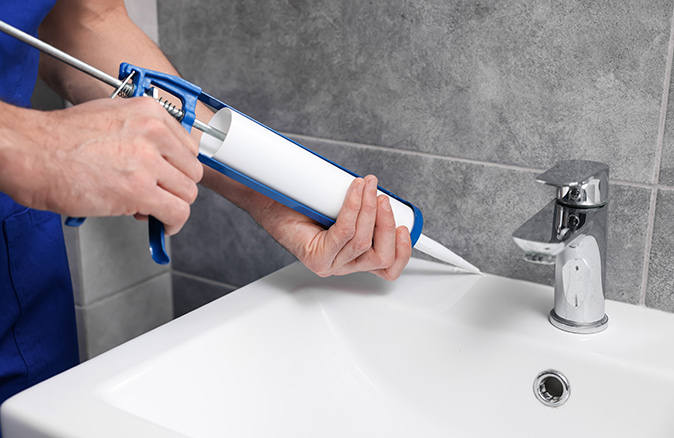
Step 5: Clean the Area
Once the caulk is fully removed, clean the surface to remove any debris, dust, or caulk residue. You can use a mild cleaner or soapy water and a sponge. Dry the area thoroughly before applying new caulk to ensure proper adhesion.
Protect Your Plumbing With a Home Warranty
Removing old caulk is a simple but important step in keeping your bathroom or kitchen clean and well-maintained. Whether you’re tackling a full renovation or just freshening up your space, proper caulk removal and application of new caulk helps prevent leaks and damage.
And for added peace of mind, a home warranty can help cover unexpected repairs to plumbing and electrical systems, and many home appliances, to help protect your home’s budget year-round. Contact us today to learn more or get a free quote.
The contents of this article are provided for general guidance only. First American Home Warranty does not assume any responsibility for losses or damages as a result of using this information.
Please be aware that if you disassemble a covered system or item, it can invalidate your home warranty or manufacturer's warranty.